Recipe Time: Maple BBQ Sauce

When I was first introduced to this recipe in the Core De Force meal plan, I knew it would be one of the first things I made. It was so easy and surprisingly delicious for being a "healthy" recipe. We now make it regularly to have it with chicken, on pizzas or topped on burgers.

Screw store bought! This is just as tasty and cuts out all the junk!

I tried my hand at making a recipe video like you see on Facebook. As you can tell, I'm definitely an amateur. My camera stand kept losing grip of the cabinet! But, you gotta start somewhere!


Here's a card you can download (click to enlarge) so you can save this to your go-to recipe arsenal.


Do you like BBQ Sauce?

What is your favorite way to enjoy BBQ Sauce?

Recipe Time: Breakfast Pizza

One of my favorite dinners really isn't dinner at all! It's breakfast!!! So when you breed these two meals together, you create what I like to call Brinner! Although waffle sandwiches or eggs and potatoes hold a special place in my heart, breakfast pizza takes the cake...or should I say pancake! Hardy har har!


For this recipe, I used eggs from my mom and dad's chickens! Talk about the best eggs ever! Also, you may have noticed that I have pita bread, which is not gluten free. That's for another time, but yes, I am having gluten again. Not much, but every now and then, I will have it. But again, more on that one later.

For now, check out my Breakfast Pizza recipe and try it for yourself! It's super easy and SUPER yummy! Also, 21 Day Fix approved! :)


print recipe

Breakfast Pizza
21 Day Fix Conversions: 1 Yellow, 1 Red, 1/2 Green, 1/2 Blue
Ingredients
  • 2 large eggs
  • Salt & pepper to taste
  • 1 piece whole wheat pita bread
  • 2-3 tablespoons crushed tomatoes
  • Pinch of Italian seasoning
  • 1/8 cup shredded mozzarella
  • 1/8" slice diced onions (optional)
  • 1/8" slice diced peppers (optional)
  • 6 julienne cut sun-dried tomatoes (optional)
Instructions
1. SET oven to broil.2. BEAT eggs, salt and pepper in small bowl until blended.3. HEAT coconut oil in 7 to 10-inch nonstick omelet pan or skillet over medium-high heat until hot. Tilt pan to coat bottom of the skillet. Pour in egg mixture. 4. PUSH cooked portions from edges toward the center with inverted turner so that uncooked eggs can reach the hot pan surface. CONTINUE cooking, tilting pan and gently moving cooked portions until no visible liquid remains.4. PLACE egg omelet onto the pita bread with a spatula. 5. MIX crushed tomatoes with Italian seasoning and spread on top of the egg omelet. Add cheese and desired toppings.6. BROIL pizza in the oven until cheese melts and crust of the pita bread begins to brown. Remove from oven and cut into desired slices and serve.
Details
Prep time: Cook time: Total time: Yield: 1 serving

Recipe Time: Slow Cooker Pasta Fagioli

It's been a while since I have posted a recipe! So here's my try at a 21 Day Fix Approved soup!


I made my own version of pasta fagioli. I was quite impressed by how good the soup turned out, considering I had to BS some of it. You will also notice I don't use the traditional pasta that is required in this recipe. That's because my grocery store doesn't have it. So brown rice pasta will have to do!

Try it yourself and let me know what you think!!


print recipe

Slow Cooker Pasta Fagioli
21 Day Fix Conversions: 1 Yellow, 1/2 Green
Ingredients
  • 1 1/2 cups crushed tomatoes
  • 1 6 oz can tomato paste
  • 4 cups vegetable broth
  • 1/2 onion, whole
  • 1 tbsp fresh parsley chopped
  • 1 1/4 cups garbanzo beans
  • 1/2 tsp Italian seasoning
  • 1 cup dry brown rice shells
Instructions
1. In your slow cooker, combine crushed tomatoes, tomato paste, vegetable broth, onion, parsley, garbanzo beans, and Italian seasoning2. Let cook on high for 3 1/2 hours.3. Add dry pasta and let cook for an additional 15-30 minutes, or until shells are cooked through.4. Top with chopped fresh parsley and grated cheese of your choice (optional) and serve.
Details
Prep time: Cook time: Total time: Yield: 5

Recipe Time: Peanut Butter Bananarama Cookies

No Sugar. No Flour. 100% flavor with only 4 simple ingredients! Since I have greatly reduced my sugar intake, I have had to get a little more creative (and healthy!) ways to help kick cravings. This one, did not disappoint!

Have any of you ever tried those 2, 3, or 4 ingredient recipes? I exposed myself to my first this past holiday season. It was a three-ingredient peanut butter cookie. They were super heavy, but delicious nonetheless. So, I decided to take make my own rendition of the recipe to make it more delicious and nutritious!

The first ingredient: 2 bananas. I opted out of using a super ripe banana so it wouldn't make them too sweet (I am trying to avoid too much sweetness anyway). I put this in my mixing bowl first to mash it up. I left it somewhat chunky though to give a unique texture to my cookies.


The next ingredient we have here is obviously peanut butter! For this recipe, I used an all natural creamy peanut butter. Any peanut butter would do though, creamy or crunchy!


The third ingredient was Gluten-Free Rolled Oats.


Finally, I added 1 tsp of cinnamon. It is my new favorite spice lately! Because I am not adding sugar, I feel that this flavor is the next best thing!

I mixed the ingredients in a single bowl with the mashed banana. Then, I rolled them into about 1 inch balls and placed them on a parchment paper-lined cookie sheet.


After baking at 350 for 12 minutes, I had these mini treats, which looks exactly like the photo above! But as you can see, they don't flatten out like pancakes, which is a plus!


I left them cool so that they could hold their shape, but they still have the consistency of a no-bake. Baking them just allows the sticky-ness to subside and so they don't easily fall apart. They were absolutely perfect! Filling and would satisfy your sweet tooth! And not to mention, they are gluten-free, vegan friendly, and have no additional sugar other than what comes in your banana or natural peanut butter.

Peanut Butter Bananarama Cookies
Recipe makes about 18-20 cookies

Ingredients
2 Bananas (Ripeness is at your discretion)
1 C Peanut Butter
1/4 C Gluten-Free (or regular) Rolled Oats
1 tsp cinnamon

Directions
1. Preheat oven to 350 degrees.
2. In a mixing bowl, mash banana until desired consistency. Add peanut butter, oats, and cinnamon. Mix until well-blended.
3. Using a spoon place a spoonful of the batter on a parchment paper-lined cookie sheet.
4. Bake for 12-15 minutes. Allow cookies to cool before enjoying so that they hold their shape.

Pumpkin Pie Smoothie!

I have said this a million times before, but I will say it again: I. LOVE. FALL! Not just for the weather or for the colors.

I think you know what I am talking about! The food and drinks!


 I know that many of you wait all year for the release of Starbucks' seasonal pumpkin spice latte. Although I do love a good pumpkin-flavored beverage that includes caffeine, I have decided that I will not be buying any from Starbucks this year.

You may have read several articles (stemmed from this one) that have stated that this seasonal favorite does not include the most ingredient of all: PUMPKIN! That instantly turned me off! I have lived on a farm my entire life and we have grown pumpkins every year. I have invested time into cooking these bad boys and making pumpkin puree. I have used it for my own pies and other seasonal desserts. The taste of fresh pumpkin puree is like no other! So when I heard that Starbucks didn't even use puree, I was really disappointed.

I decided to invest my time and money into my own creation using actual pumpkin! It may not contain caffeine, but it is a delicious (and healthier) treat for any time of the day! You can enjoy it for breakfast, a snack, or even a meal replacement!

Pumpkin Pie Protein Smoothie


Ingredients
  •  1 Scoop (about 50g) of Vanilla Shakeology
  • 2 TBSP Libbey's Pumpkin Puree
  • 1 C Almond Milk (I used 1/2 almond and half water since I had vanilla almond milk)
  • 1 tsp Cinnamon
  • 1 tsp Pumpkin Pie Spice
  • 8-10 Ice Cubes

The easiest directions in the world: Throw it all in a blender and let 'er rip!


I drank this gorgeous beverage in no time and felt no remorse!!! It is just under 250 calories, so what is there to feel guilty about?!


Gluten Free Friday....Uh...Sunday

As you have heard in my last several entries, I am on a journey of becoming gluten-free. This will be a transition, for sure. I have start making many changes, like incorporating gluten-free recipes into most of my meals. If I notice a substantial difference in my health, maybe then, I will make the full conversion.

It has already proved itself though. Not physically, but my overall awareness of what I eat has shown itself. I have generally eaten pretty healthy...or so I thought. Then, as I researched more into Paleo and GF, I have noticed that I do not eat nearly enough fruits and vegetables as I should!!! So this past grocery visit was an eye opener. The majority of my foods were purchased in the first aisle.

Here was today's stock pile of GF approved foods...
  • Pinapple
  • Bananas
  • Apples
  • Avocados
  • Sweet Potatoes
  • Strawberries
  • Lemons
  • Limes
  • Spinach
  • Carrots
  • Broccoli
  • Sugar Snap Peas
  • Cucumbers
  • Zucchinis
  • Yogurt
  • Eggs
  • Sirlon Steak
  • Turkey
After playing Super Market Sweep at Target, I journeyed to Britner's produce for some CORN!!!


I got enough to have for lunch, dinner, and additional servings to freeze.

That is GF pizza crust, by the way :-)


Anyway, before I get side-tracked about the glory of corn, it is GF Friday! I am just late on this, but I want to share one GF receipe that I have tried & loved every Friday. So far, all that I have tried, I have loved. But we will start with this sexy meal...

Spicy Sriracha Chicken Over Quinoa


Ingredients
  • 1 C dry Quinoa, cook according to package directions
  • 1/4 C Virgin Coconut Oil 
  • 1/2 C Green Onion, chopped  
  • 1/2 Green Pepper, diced
  • 2 LBS Chicken Breast, cut into bite-sized pieces
  • 1/2 C Sriracha (we suggest going less, unless you like to feel the burn!!!)
  • 1/4 C Agave Nectar
  • 1 TBSP Lime Juice
  • Black Pepper to taste
  • Garlic Salt to taste
  • Cilantro to taste
Directions
  1. Melt oil in large saucepan on medium heat. Sauté onions & peppers until soft. Add chicken & cook until browned.
  2. Mix together syrup, lime juice & Sriracha in a bowl.
  3. Add the sauce to chicken & simmer for about 8 minutes and chicken is cooked through. Stir through out. Season to taste with pepper & garlic salt.
  4. Finish with cilantro and serve over prepared quinoa.
 Try it out and let me know what you think of this delicious meal!

By the way, I have returned to running again! But that will be a separate post on it's own!


Do you like spicy foods?

 Corn: Diet Friend or Foe?

Homemade Heaven...Nutella

I am about to give you the BEST. RECIPE. EVER! So get your ovens prepped, your measuring cups out, and get ready to make a jar filled with happiness and rainbows. If you have a nut allergy, this may compromise your ability to enjoy this treat and I apologize now, but you are not completely out of luck. Google “nut-free Nutella recipes” and you will find a several so you can enjoy the heavenly treat as well!

So, if you didn’t already gather from the title or the previous sentence (I lack in surprises), we are making a homemade jar of “Nutella”!


I figured it was a perfect time to post this recipe since I am journeying to the chocolate capital this weekend (Hershey, PA). This is a surprisingly simple and a lot cheaper than buying a $6-8+ dollar jar from the grocery store (I bought my nuts in bulk to help reduce cost)! Also, this recipe is probably a lot better for your body because YOU know what is going in the jar. No more nasty preservatives!

Now, I did not follow the standard “Nutella” recipe that calls for hazelnuts. I used almonds which in no way compromised taste. However, you can easily sub the almonds in my recipe with hazelnuts if you desire.


Homemade “Nutella”

Ingredients
  • 2 C Almonds (or Hazelnuts)
  • 1 C Sugar
  • 1/3 C Hershey’s Cocoa
  • 2 TBSP Oil (I used EVOO)
  • 1 TSP Vanilla Extract

Directions
  1. Preheat your oven to 325 degrees and cover a cookie sheet with your almonds (or hazelnuts). Bake for 12-15 minutes.
  2. After letting the roasted almonds cool, add the nuts to your food processor. Begin to blend for several minutes, occasionally scrapping the sides, until the nuts form a creamy paste. This process can take anywhere from 10-20 minutes depending on the quality of your food processor.
  3.  Once creamy, add sugar, cocoa, oil, and vanilla extract and continue to blend until fully mixed. It will look like Nutella!
  4. Add the “Nutella” to a jar (I used a Mason Jar) which will need to be refrigerated to extend the shelf life. If you are like me, you may eat this in a matter of days. :)

I personally found this delicious beyond my expectations. It is definitely one of those recipes where you are licking the food processor bowl as you are cleaning up.

Oh and what is also so great about this recipe is that you don’t have to make it into Nutella. You can make it almond butter by stopping before adding the sugar, cocoa, oil, and vanilla! Just load it into a jar and you have a tasty batch of almond butter.


 I prefer adding some organic agave syrup to sweeten it just a tad, but it all is based on your own taste buds! This will also save you a great deal of cash because I have been told some jars run as high as $10!!! No thanks! I’ll take the time to make my own. J


Are you a major Nutella fan? How do you eat it?

What are your feelings on the price of nut butters like Nutella, Almond Butter, Peanut Butter, etc?

Recipe Time! Grilled Avocado Chicken Burger

It was about a year ago that I became OBSESSED with avocados. They are one of my favorite fruits (it's a fruit, right?). I try to incorporate avocados in all of my sandwiches, salads, wraps, tacos, etc. Now, I found a way to put them in a burger. And I don't mean on top of the burger meat, but IN the meat itself. It is magically delicious!

Try it out!!!

Grilled Avocado Chicken Burger
Makes 4-5 burgers


Ingredients

  • 1 lb Skinless Chicken Breast (shredded or whole)
  • 1 Chopped Ripe Avocado
  • Lemon or Lime Juice (optional)
  • 1 Chopped Garlic Clove
  • 2/3 C Whole Wheat Bread Crumbs
  • 4-5 Whole Wheat Burger Buns (optional)

Directions
  1. If you chose to start with shredded chicken, you can skip to step 2. I shredded my own chicken by placing in my Crock-Pot and adding a half cup of water. Cook high for about 2 hours or until chicken is fully cooked and shreds. Remove from pot and drain excess water. Set aside in it's own bowl.
  2. In a small mixing bowl, add chopped avocado and drizzle on lemon or lime juice (will add flavor and prevent avocado from browning over time). Mix in chopped garlic and bread crumbs. Add shredded chicken to bowl and mix well so all ingredients are evenly distributed.
  3. Form 4-5 patties and place on grill or skillet (my skillet was set on 400 degrees). Let cook for 3-5 minutes per side.
  4. Serve on whole wheat bun.
 Don't let it's looks fool you! It is really good! I plan on marinating the chicken next time around in a little bit lemon juice and garlic so it is more flavorful!

Tell me what you think and please, share with me your avocado recipes!

Recipe Time! Mexican Casserole

Mexican Casserole has been apart of my life for as long as I can remember. My mom has made it for our family for years and it was always a favorite among us. It is perfect for potlucks, birthdays, dinners, and much more!  The leftovers aren't too shabby either!

And did I mention it is SUPER easy to make?

------------------

In an lightly oiled skillet, cook meat completely, adding onion and pepper as it cooks.


 Unroll crescent roll dough and lay flat on the bottom of a casserole dish. This will serve as the crust.


Crush tortilla chips in bag and layer half of the bag directly on top of the crust.


 Add beef mixture on top and spread evenly.


 Spoon sour cream on top of the beef as your next layer.


 Sprinkle on the cheese (we only had sliced cheese that day)...


 ....and top off casserole with remaining crushed tortilla chips. Bake in oven for 25-30 minutes, or until the crust is brown.


Mexican Casserole


Ingredients
  • 1 lb lean beef, chicken, or ground turkey (they all taste delicious!)
  • 1/2 medium white onion, chopped
  • 1/2 medium bell pepper, chopped
  • 1 6oz can of tomato sauce
  • 1 pkg taco seasoning (or make your own!)
  • 1 can of Pillsbury crescent rolls
  • 1 bag of Tostitos tortilla chips
  • 4oz sour cream (we go light)
  • 1 C shredded mozzarella cheese (any really works, sharp cheddar is a close second)
Directions
  1. Preheat oven to 350 degrees.
  2. In an lightly oiled skillet, cook meat completely, adding onion and pepper as it cooks. Pour in tomato sauce and add package of taco seasoning, stir and let simmer.
  3. Unroll crescent roll dough and lay flat on the bottom of a casserole dish. This initial layer will serve as the crust of the casserole.
  4. Crush tortilla chips in bag and layer half of the bag directly on top of the crust. Add beef mixture on top and spread evenly. 
  5. Spoon sour cream on top of the beef as the next layer. Sprinkle on cheese and top off casserole with remaining crushed tortilla chips.
  6. Bake in oven for 25-30 minutes, or until the crust is brown.
Bon Appetite!

This meal is also very easy to tweak. Not only can you use various meat and cheeses, but you can also add additional ingredients. In the past, I have added corn and jalapenos and it is just as delicious!

Recipe Time! Cornflake Chicken Strips

I did it! I made it to 10 miles and it only took about a week to get back up there! I could not be happier. Well...I will be happier once I get to this Justin Timberlake and Jay-Z concert tonight in Hershey, PA. That will be a post in itself though!

For today's blog, I am going to give you guys a recipe from a meal I enjoyed last night. Enjoy!

Now, we all love having a breaded chicken breast. But here's a mix up on a traditional recipe. Switch out your bread crumbs for crushed cornflakes! It gives your chicken a crunch that only this classic breakfast cereal will provide! It's so simple and your whole family will love it!


Ingredients
  • 1 lb Skinless, Boneless Chicken Breast, Cut Into Strips
  • Seasonings to Taste (We used crushed red pepper, chipotle powder, garlic powder)
  • 1 Egg, Slightly Beaten
  • 2 C. Cornflakes, Finely Crushed
 Directions
  1. Cut chicken into 3-by-3/4-inch strips. Place in ziplock bag with desired seasonings. Allow to marinate (you can skip this step and simply add any seasonings directly to chicken).
  2. Preheat oven to 450 degrees. Then, in a shallow dish whisk egg until yoke and white well mixed. In another dish, add cornflake crumbs.
  3. Dip marinated chicken strips into the egg mixture; roll in cornflake crumbs to coat. Arrange chicken strips on an ungreased baking sheet.
  4. Bake for12 minutes, or until outsides are golden and chicken is not pink in center.

This dish was beyond easy and it was yummy. With the leftovers, we were able to enjoy the chicken on a whole wheat tortilla wrap with veggies. The cornflakes did not stay crunchy, but that didn't make it any less enjoyable.  So if you want crunchy cornflakes, eat them soon after they are finished baking.

I give this meal an 8 because of it's simplicity and flavor. After marinating, this meal was ready to serve in no time!

    Recipe Time: California Sandwich

    Another recipe!? I've been really taking advantage of my time off to put together some meals I've never tried or have not had in eons.  Like this one...

    Last year, my mom introduced me to one of the most scrumptious veggie sandwiches I have ever tasted: A California Sandwich. It includes so many delicious summer veggies, which means it is packed with nutrients! It's a scrumptiously healthy lunch or dinner that keeps the oven heat at bay! Also...vegetarian friendly!!!


    California Sandwich
    Serves 2

    Ingredients

    • 1 Avocado, Diced
    • 1 Medium Tomato, Diced (fresh from Britner's Produce!)
    • 1 Cucumber, Diced (fresh from Peter's mother's garden!)
    • Squeeze of lime juice
    • 2 Tablespoons of Cilantro
    • Salt and Pepper, to taste
    • 4 Slices of Whole Wheat Bread or Tortilla Wraps! (we toasted our bread)
    • 1/4 cup Alfalfa Sprouts
    Directions
    1. In a medium bowl, mix avocado, tomato, cucumber, lime juice, and cilantro. Season with salt and pepper if you desire.
    2. Divide sprouts onto two individual slices and top with avocado salad. Cover with remaining bread slices.
    3. Enjoy!


    Even though I prefer to have meat in my meals, this one is satisfying without! The avocado is basically the meat of this sandwich! It also kicks hunger to the curb! I definitely give this sandwich a 10, hands down. Even Peter liked it :o)

      Recipe! Stuffed Peppers with Quinoa and Chicken

      Since I've been out of commission, I have been making an effort to nourish my body as it needs with the little activity I have put forth. That means, attempting to cut down on my portion sizes and limiting some of the sugars and fats I normally take in and modifying them with clean foods.

      I have been on the search of trying some new things or twisting recipes that I am already familiar with. One meal that I was looking forward to making was stuffed peppers! I have made this dish once in the past, but not quite like this!


      Spicy Chicken Stuffed Peppers with Quinoa and Veggies
      Serves 2

      Ingredients 
      • 1/2 lb Chicken, Cubed
      • 2 Large Green Bell Peppers
      • 1 Garlic Clove, Chopped
      • 1/2 Cup Onion, Chopped 
      • 1/2 Cup Corn (we used fresh corn on the cob...Britner's Produce)
      • 1/3 Cup Tomatoes, Chopped (farm fresh from...again....Britner's Produce!)
      • 1/2 Cup Quinoa, Cooked
      • 1 oz Shredded Sharp Cheddar (your preference of cheese is fine)
      • Seasonings to Taste (we used black pepper corns, crushed red pepper, and chipotle seasoning)
      • Sriracha (optional)


      Directions
      1. Preheat oven to 400 degrees.
      2. Cut off tops of bell peppers, removing center and add to a small casserole dish.
      3. Prepare Quinoa according to instructions.
      4. In an oiled skillet, on medium heat, cook chicken until cooked through. Reduce to low heat, adding garlic and onions with any seasonings and sriracha as you desire. Continue cooking until onions soft.
      5. Mix chicken and onions into a medium sized bowl with prepared quinoa, adding diced tomatoes and corn.
      6. Stuff peppers with the chicken & quinoa mix and top with shredded cheese. Drizzle sriracha if you are looking to add extra spice
      7. Cook for 25 minutes and serve hot.

      This is the first time I have prepared a meal using quinoa. In fact, this is the first time I have ever ate quinoa. I heard it was a great substitution for rice and offers a great deal of protein, fiber, and calcium. It definitely gets a thumbs up from me! Delicious!

      Overall, Peter and I give this meal a 9 on a scale of 1-10. It was filling, it was healthy, and what I loved most was that it was stuffed with fresh produce. I am telling you, if you live near the Western Maryland area, please stop by Britner's Produce. You will not regret it!

      Let's Be Amish Bread Friends!

      How do you end a hot summer run?


      I don't think there is a better way to finish a run than relaxing on a hammock in the shade.

      Oh, and baking/eating!

      Peter and I were recently introduced to Amish Friendship Bread. We love it so much that we have made 3 cycles of it.


      Here's how it works. A friend of yours gives you a bag of what they call a "starter".


      You harvest the starter for 10 days, squishing the bag and adding ingredients as the instructions indicate. On the 10th day, you continue adding ingredients and it will give you enough batter to make 4 starter bags (one for you and 3 friends). With what batter is left, you are able to bake 2 loaves of mouth watering sweet bread.

      If you have not ever received a starter and want to start your own friendship bread, you can find the recipe here. It yields enough for 4 starters: one for you and 3 friends. Unless, of course, you want to keep more for yourself. Don't worry, I won't tell. We did that tonight.

      Our mess!

      You can also get a little creative with the recipe. It calls for pudding mix and any flavor will do. Vanilla seems to be the popular choice. We chose that and banana (we had 2 starters to make).


      You can also add nuts and chocolate chips to your batter. Peter and I prefer adding them about 10 minutes into baking so they sit closer in the middle as opposed to the very bottom or top.

      These are the banana loaves we made.


      Yes, that one in the back looks frightfully burnt, BUT both were on the exact same temperature for the exact amount of time. Not sure what happened there.

      Anyway, this bread is perfect for breakfast or a snack. I will typically eat my bread for a snack between breakfast and lunch. I don't really consider this healthy, but you can definitely modify the recipe to include skim milk, low fat/sugar pudding, replace sugar with spenda, etc. However, know that you are able to subject yourself to SOME naughtiness every once in a while. ;-)

      Enjoy and Happy Hump Day!


      What is the ideal way to end a run? Do you read, watch TV, eat?
      - I usually eat :o)

      Have you ever made Amish Friendship Bread?

      What pudding flavor would you use to make your bread?

      Food Friday: Chicken Quesadillas

      Food Foto Friday has been postponed! It was one of those days where I didn't have time to do anything but work. It's been quite the week. I think I've gained some gray hair. :(

      Today will just be Food Friday: Chicken Quesadilla Style

      *****

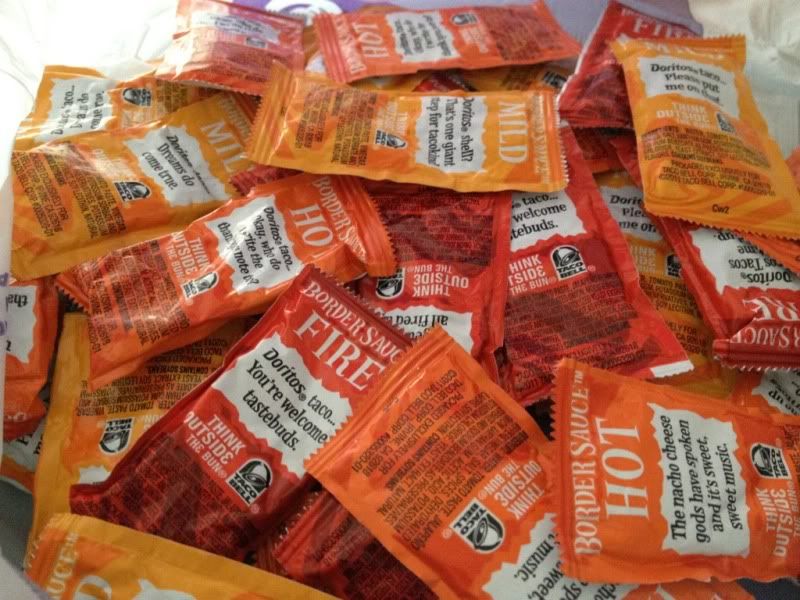
      When I choose to go to Taco Bell, my menu choice is always the same: A chicken quesadilla...and do not forget handfuls of the hot sauce packets.


      I started making my own quesadillas about a year ago and I must say, I think I have Taco Bell beat. The recipe is super easy so get ready to make your own!

      SPICY CHICKEN QUESADILLAS 
      Yields 4 Quesadilla Servings

      Ingredients 
      *Note: These amounts are purely estimates of what we normally use.*
      • 8 Ct Medium Whole Wheat Tortillas (we have used both the Mission and Chi-Chi brands, both good)
      • 1.25 lb Skinless Chicken Breast
      • 1/2 Small Onion, Chopped
      • 1/4 Cup Frank's RedHot
      • 1/2 Bell Pepper, Chopped
      • Shredded Mozzarella Cheese
      • 1/2 Cup Ranch Dressing (we used the light version)
      Directions
      1. Cut chicken into cubes and cook on a lightly oiled skillet. Add 1/4 C of Franks to marinate chicken (we also added a dusting of chipotle seasoning, use if you'd like). Before chicken fully cooked through, add onions and peppers. Let simmer.
      2. In a small bowl, mix ranch with desired amount of Franks. (We normally add a little at a time, stir and taste. We will add more if not zesty enough. If you add too much, you can always mix in more ranch, you may have leftover mix in the end)
      3. Spoon spicy ranch mix onto a tortilla and spread evenly. You only need about 2 tbsp per tortilla. Sprinkle on desired amount of mozzarella and add cooked chicken mixture. Place another tortilla on top
      4. On a skillet, cook quesadilla until each tortilla has browned, flip as needed. (we purchased a George Foreman Quesadilla Cooker because I suck at flipping anything on a skillet).
      5. Cut and serve with desired dips.

      Buffalo Chicken Pizza

      I love pizza. You love pizza. Let's make some pizza!

      I am pretty confident in the pizzas I've made myself so I thought I'd share the recipe for the pizza I had this evening. I have yet to find a pizza crust that beats this one. I'd like to find a great whole wheat recipe, but for now, regular flour it is! Now, if you want to prepare this pizza like Peter and I do, you'll also have to start the chicken the night before. Everything is explained...

      Buffalo Chicken Pizza
      Pizza Crust Recipe


      Ingredients (Yields One 14-16in Pizza Crust)
      • 1 pkg Yeast
      • 1 Cup Warm Water
      • 2.5 Cups Flour
      • 2 Tbsp Olive Oil
      • 1 tsp Sugar
      • 1 tsp Salt
      Directions
      1. In a large mixing bowl, add package of yeast. Stir in warm water until yeast dissolves.
      2. Add flour, olive oil, sugar, and salt, beat until ingredients fully mixed. (I like to use my hands for this step)
      3. Let dough rise for 1-2 hours. (You could probably lessen the time frame, but I wouldn't recommend it).
      4. Add flour to hands and pizza pan surface (pizza stones are great!). Press or roll out dough to desired size and thickness. *Keep in mind the dough rises nicely!*
        
      Pizza Recipe


      Ingredients (Serves 6-8)
      • 1/2 lb Skinless Chicken Breast
      • 1/2 Cup Frank's RedHot Buffalo Sauce
      • 1-14 oz Jar of Classico Fire Roasted Pizza Sauce or any preferred pizza sauce (we were lazy to make our own but this stuff is delicious!)
      • 1 Cup Shredded Mozzarella Cheese
      • 1/2 Small Onion, Chopped
      • 1/4 Red Bell Pepper, Chopped
      Directions
      ****If you chose to marinate chicken overnight (recommended!), cut chicken into cubes, adding to large Ziplock bag. Add buffalo sauce to bag. (We also added seasoned salt and garlic powder to our liking).****
      1. Preheat oven to 425 degrees.
      2. In a sauce pan, add chicken, buffalo sauce, and seasonings of choice to sauce pan. Cook on medium high until chicken fully cooked through. Drain excess sauce (unless you want extra on your pizza!)
      3. With pizza crust already prepared, spoon on pizza sauce (you may only find yourself using half the jar).
      4. Sprinkle on cheese, onions, peppers, and chicken.
      5. Bake for 20-25 minutes.

      Hangover/St Patty's Day Run

      I attempted the "hangover" run as I mentioned in yesterday's post.

      It was cloudy, but the sunglasses seemed completely necessary

      It wasn't bad as I sure looked. I'm not sure what my fastest 7 mile trail time is, but it went quite smoothly and with no increased effort due to the alcohol binge. I also focused on my ChiRunning form for 2 miles out of the entire run. I'm getting better!

      Now, to last night, which was a BLAST!

      Some of my favorite girls: Ashley, Me, Bethany, and my sister, Ashley.


      We had our Saint Patrick's Day Party and it was a great success! Everyone drank, ate, played games, and more. Oh, how I wish every weekend could play out like this. Minus my food binge. There were so many delicious snack foods. My personal favorite were the cheesy stuffed peppers my friend, Misty made. Also, Ashley's husband, Ben made amazing mint brownies. I must harass them for the recipe!

      Peter and I contributed a few things ourselves, like the famous Buffalo Chicken Dip. If you've never tried/made it, you can find a recipe on any Frank's RedHot bottle. Like always, our recipe is different. Here's our variation.


      Buffalo Chicken Dip

      Ingredients
      • 1 Cup Chicken (recipe calls for canned, we used fresh chicken breast)
      • 8 oz of Softened Cream Cheese (we used one regular and one with 1/3 less fat)
      • 1/2 Cup Ranch Dressing (we used the light)
      • 1/2 Cup Frank's RedHot
      • 1/2 Cup Mozzarella Cheese


      Directions
      1.  If you are using fresh chicken, cut chicken into cubes and cook on an oiled skillet. Cook until middle is no longer pink.
      2. In a large bowl, combine cream cheese, ranch dressing, Frank's RedHot,  mozzarella cheese, and chicken. Stir until creamy.
      3. Pour ingredients into a Crock-Pot and set to low. Once cheese is melted and the dip is warm, you may enjoy! (We prefer leaving in for 2-4 hours, allowing the chicken to sop up the flavors).

      You can enjoy this with crackers, pretzels, by itself...we always choose to serve with the Tostitos Multi-Grain Scoops. We have never ended a party with leftovers of this so it's also nice to double the recipe, which is what we did for our party.


      Have you celebrated St. Patrick's Day yet? Have any good eats/treats/drinks?

       What is your ultimate must-have party food? Post the recipe if you'd like!

      Run Legs Run & Potato Chip Recipe!

      I'm finished chapter 3 in ChiRunning and I've now started adding sticky tabs to the pages of interest. One area that really intrigued me was the subject of breathing through your noise, not your mouth. Uh...what? I didn't even know that was possible. The author mentioned that if you have to breathe through your mouth, you're working too hard. Somewhere, your body is using too much energy from tension. The key is to locate the area of your body that needs to relax and change it. Whether it is readjusting your form or taking a deep breath and releasing it.

      On my run, I put forth the effort to breathe through my noise. It was simple for the first 2.5 miles. Once I started adding incline, I didn't last. Even when I reduced the incline, it was difficult for me to return to nose breathing. At that point, I decided to solely focus on running with my center and letting gravity pull me forward.

      One thing that the author did recommend was taping yourself while running to understand what your running form looks like, seeing if there needs to be improvements.

      Sorry about blinding you with my super white legs.

      The only thing I could see were my legs. I didn't realize I had such long legs! I also don't think I'm leaning forward as he indicates, but I'll learn more in this next chapter.

      Anyway, shortly after my run, I decided to do some major multitasking.


      Weight lifting AND baked potato chips?! I had plenty of time between cutting and baking that fitting in a weight & ab workout was nothing!

      The recipe is really quick and super easy if you wanna try it for yourself.

      Ingredients
      • Potatoes (feel free to use a sweet potato!)
      • Olive Oil
      • Seasoning of Choice (I used Old Bay!)
      Directions
      1. Preheat oven to 425 degrees and line a cookie sheet with parchment paper.
      2. Using a mandolin or a knife, cut potato into slices about 1/8 inch thick.
      3. Lay potatoes on parchment paper and drizzle olive oil on top. Add seasoning.
      4.  Bake in oven for 10 minutes, flip, and bake for an additional 10 minutes. Chips should be slightly browned and delicious!


      I was pleased that they turned out. I also need to try and get rid of my potatoes before they go bad! This was a perfect way to rid myself of 3!


      Do you breathe through your nose when you run? Have you ever tried?

      Have you ever watched yourself run? How do you think you look?

      What is your favorite recipe using potatoes?
      Professional Blog Designs by pipdig